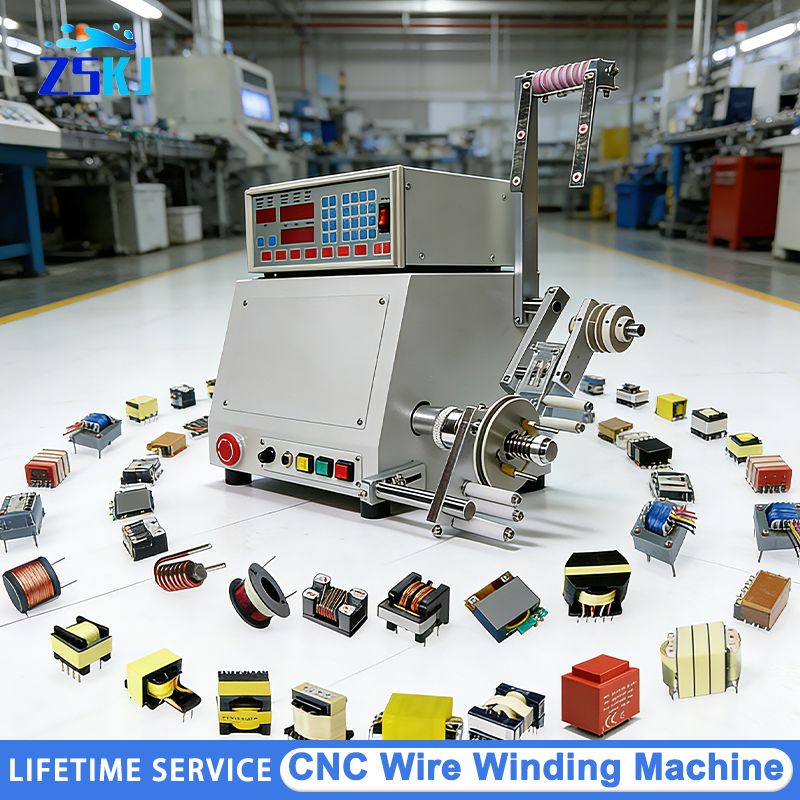
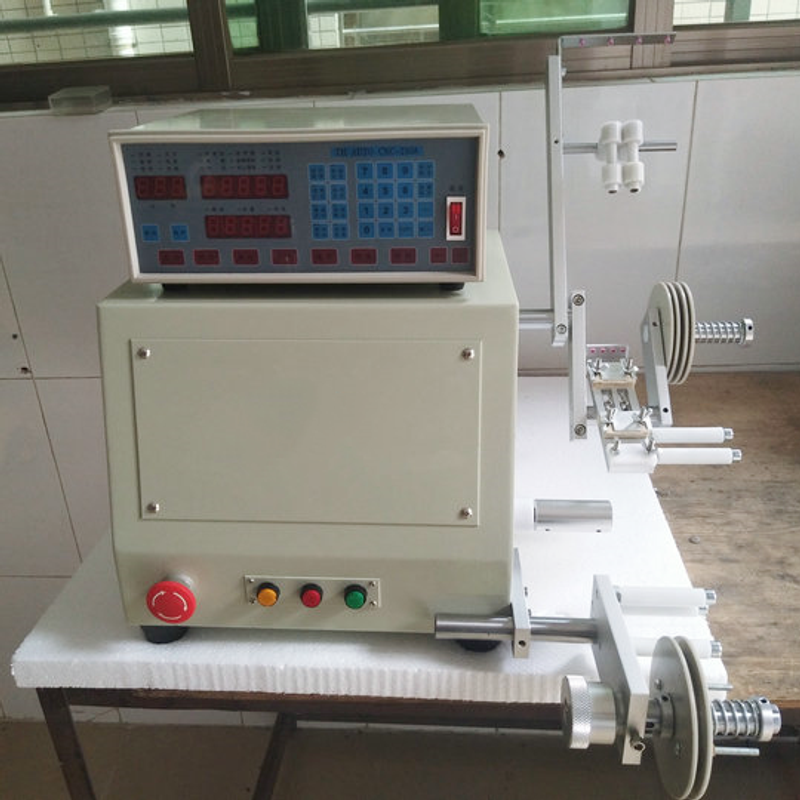


0.03-1.2mm CNC Winding Machine Transformer Automatic Wire Winding Single-axis Brushless Copper Wire Enameled Cables Winder
Includes all taxes
Meet your Seller
-
$1,481.57Sold by BILLIONS BIRDS
Description
Product Introduction
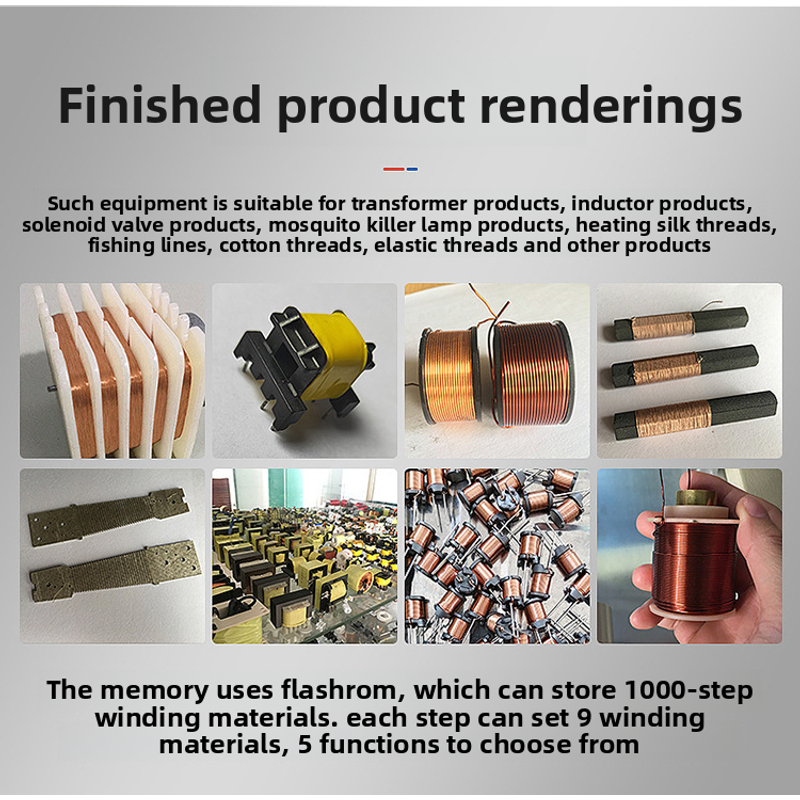
1. This type of equipment is suitable for winding transformer products, inductor products, solenoid valve products, mosquito-killing lamp products, heating wires, fishing wires, cotton wires, elastic wires and other products
2. The memory uses FLASHROM, which can store 1000 steps of winding data. Each step can be separately set with 9 types of winding data and 5 function options
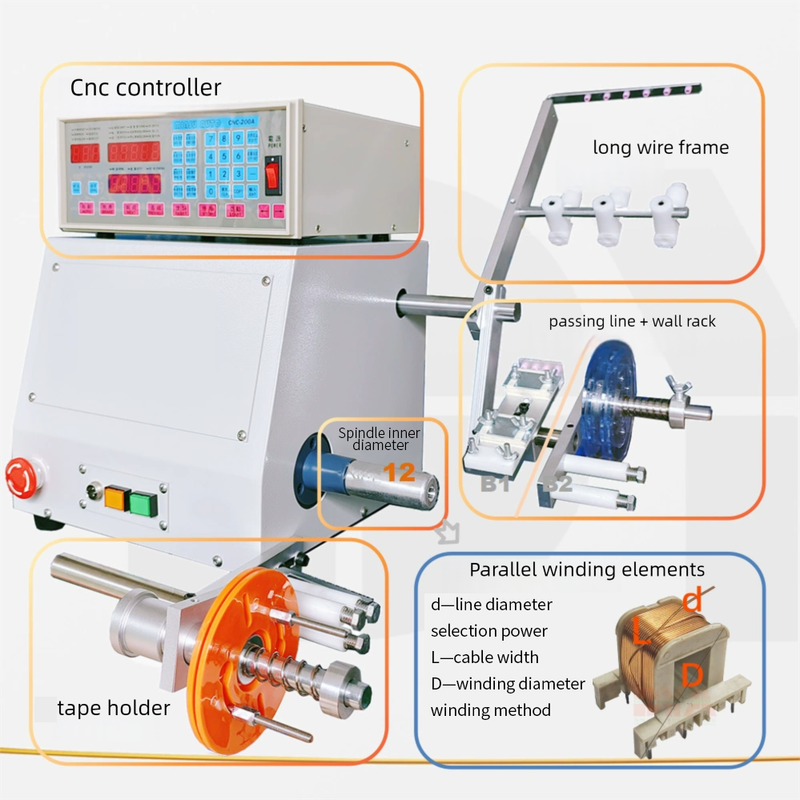
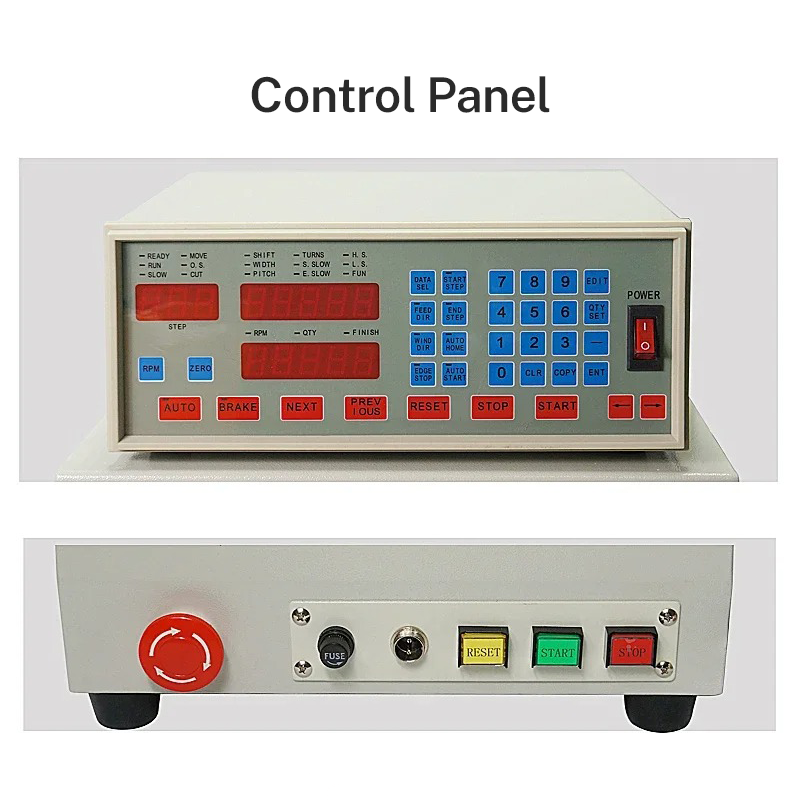
3. Control Panel
The electronic control display panel is intuitive, clear and convenient for viewing and operation
4. Wiring accuracy
The cable layout tray is made of anti-rust material for cable layout. The diameter can be adjusted according to the demand to improve accuracy
5. Stable performance
It adopts an all-copper motor, which features strong stability and high working efficiency
Product Parameters
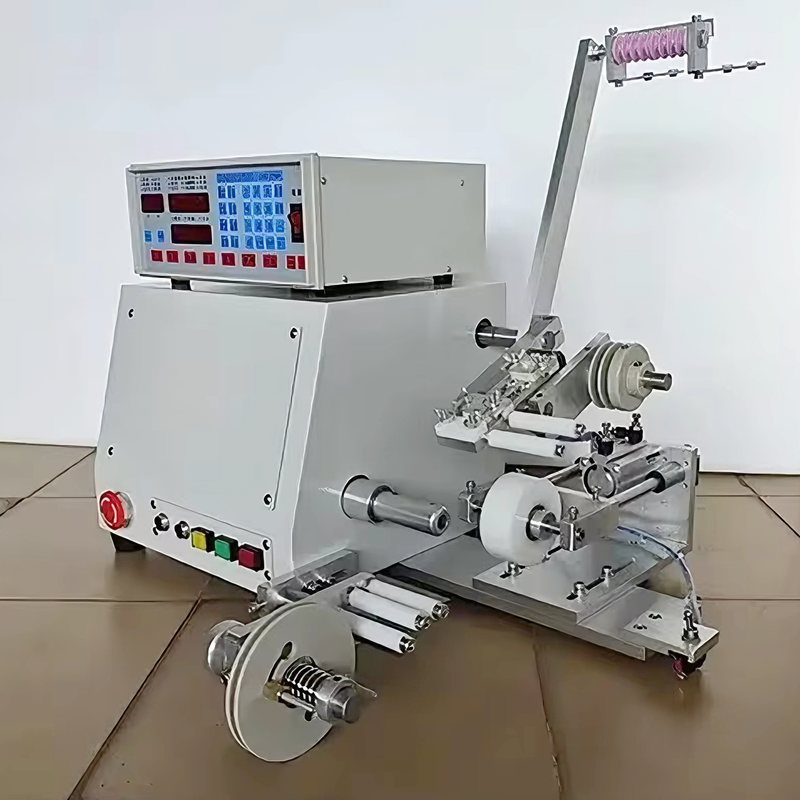
Equipment NameCNC single-axis side brushless winding machine
Number of axes: Single axis
Motor: 400W or 750W DC brushless
Ribbon cable motor: 57 stepper motor
Maximum rotational speed: 6000
Power supply: AC110V, AC220
Frequency: 50/60HZ
Applicable wire diameter: 0.05-1.2
Maximum width: 100MM
Memory groups: 999 groups
Maximum rotation diameter: 200MM
Net capacity of the machine: 30KG
Net dimensions of the machine: 320*340*400
The size of the accessories after installation is 550*480*530
The performance features of the winding machine have the following advantages:
The wire arrangement accuracy is high, reaching up to 2 wires. The spindle positioning is accurate, which can completely replace the old-fashioned method that requires manual wire holding to increase efficiency.
Random accessories: 1. One power cord; 2. One foot switch; 3. A set of random tools; 4. One instruction manual


Customers using this machine for the first time, please read carefully
Make the Settings when the power is plugged in and the machine is turned on. Taking the single-slot skeleton as an example:
First, set the initial step sequence:
1. Follow the initial step sequence. At this point, the step sequence digital display will flash. Enter 1 and then press the input key to save.
Two, End Step Setting:
1. Since it is a single-slot skeleton, the end step sequence is also 1. (If it is multi-slot or a tap is needed in the middle, a value greater than 2 must be entered.) Press the end step sequence key, enter 1, and then press the input key to save.
At this point, the step sequence setting is completed, and we enter the winding data setting.
Three, Winding Data Settings:
1. Press the step setting key, then press the input key to enter the data setting interface. At this time, the numbers on the data display will flash.
2. At this point, the starting point indicator light is on, and you enter the starting point setting: (The starting point refers to the starting position of the cable to be arranged.) If you don't know the position of the starting point, you can fine-tune it left and right through the < -- > arrow keys to a suitable position, press the input key to save, and proceed to the next step.
3. At this point, the width indicator light will come on. The width refers to the winding width of the frame. Enter the width dimension number and press the input key to save and proceed to the next step
4. After setting the starting point for winding, the wire diameter indicator light will come on. The wire diameter refers to the size of the copper wire. It should be set a little larger than the actual wire diameter. The exact increase depends on the winding effect. Enter the wire diameter size number, press the input key to save and proceed to the next step
5. At this point, the total number of turns indicator light comes on. The total number of turns refers to the total number of turns of the skeleton winding. Press the number keys directly to input the corresponding numbers, press the input keys to save, and proceed to the next step.
6. At this point, the indicator light for starting the slow winding will come on. Starting the slow winding means: how much the speed slows down when the winding begins. Generally, it doesn't have to be 0. If necessary, you can input 1 turn or 0.5 turn, press the input key to save, and proceed to the next step.
7. At this point, the "Stop slow vehicle" indicator light comes on: "Stop slow vehicle" refers to whether deceleration is needed after the last few turns of the winding. Generally, it is set as one turn.
Press the number keys directly to input, then press the input key to save and proceed to the next step.
8. At this point, the high-speed indicator light comes on. "High-speed" refers to the percentage of the winding speed. Note that the high-speed cannot be set to 0
The maximum rotational speed of the motor is 6000 revolutions per minute. Inputting 80 is 80% of 6000, which is 4800 revolutions per minute. Inputting 60 is 3600 revolutions per minute. After inputting the numbers, press the input key to save and proceed to the next step.
9. At this point, the low-speed indicator light comes on. The low speed refers to the speed during low-speed winding, which is usually 10. Note that the low speed cannot be set to 0. After inputting, press the input key to save and proceed to the next step.
At this point, the data has been input completely. Press the reset button, and the ribbon bar will automatically return to the preset starting point position.
Notes
When setting the winding data, pay attention to the winding direction indicator light of the ribbon cable. Whether the ribbon cable direction indicator light is on or off indicates that the ribbon cable moves from left to right and from right to left. The winding direction is the same. The automatic return and automatic start usually light up
Notes
1. When setting the winding data, each first step is automatic and braking, the winding direction automatically returns to position, the light automatically starts, and the light goes off.
2. All other steps from step 2 to the last should be automatic, with the brake light on, the power cord direction automatically returning to position, and the automatic start light on
3. After the Settings are completed, press the reset key. At this point, the Settings are finished.
4. Install the fixture, place the frame and wind the wires. If the wound wire is a bit thin, in the standby state, press the step setting key and then the input key to enter the winding data setting, and change the wire diameter. Generally, the set wire diameter should be a little larger than the actual wire diameter. The exact increase depends on the actual winding situation and should be adjusted accordingly.
5. If there is an overlap on the edge of the frame after winding, it is the same. In the standby state, press the step setting key and then the input key to enter the winding data setting. Modify the width data. Generally, the set width data should be a little smaller than the actual width. Make corresponding adjustments according to the actual situation.
Shop Policies
Payment Policy
Payment Policy – BILLIONS BIRDS
At BILLIONS BIRDS, we are committed to providing a safe, secure, and seamless payment experience for our customers.
1. Accepted Payment Methods
We accept the following payment options:
Major Credit & Debit Cards (Visa, MasterCard, American Express)
Secure Online Payment Gateways (such as PayPal, Stripe, or other providers available at checkout)
Any additional payment methods displayed during checkout
All payments must be completed in full at the time of purchase.
2. Secure Transactions
All transactions are processed through encrypted and secure payment systems to protect your personal and financial information. We do not store your full payment details on our servers.
3. Currency
Prices are displayed in the currency indicated on the website. If you are purchasing from another country, your bank may apply currency conversion fees.
4. Order Confirmation
Once your payment has been successfully processed, you will receive an order confirmation email containing your purchase details.
5. Failed or Declined Payments
If your payment is declined, please verify your billing information or contact your bank. Orders will only be processed after successful payment confirmation.
6. Fraud Prevention
BILLIONS BIRDS reserves the right to cancel or refuse any order if fraud or unauthorised activity is suspected.
Delivery Policy
Delivery Policy – BILLIONS BIRDS
At BILLIONS BIRDS, we are dedicated to delivering your orders safely and efficiently.
1. Order Processing
All orders are processed within 1–3 business days after payment confirmation. Orders are not processed or shipped on weekends or public holidays.
2. Shipping Times
Estimated delivery times vary depending on your location:
Domestic Shipping: 3–7 business days
International Shipping: 7–15 business days
Please note that delivery times are estimates and may vary due to customs procedures, carrier delays, weather conditions, or other unforeseen circumstances.
3. Shipping Costs
Shipping fees are calculated at checkout based on your location and selected shipping method. Any customs duties, taxes, or import fees are the customer's responsibility.
4. Tracking Information
Once your order has been shipped, you will receive a confirmation email with tracking details (if available) so you can monitor your package.
5. Delivery Issues
If your order is delayed, lost, or arrives damaged, please contact us within 7 days of the expected delivery date. We will work with the shipping carrier to resolve the issue as quickly as possible.
6. Incorrect Shipping Information
Customers are responsible for providing accurate shipping details at checkout. BILLIONS BIRDS is not responsible for orders shipped to incorrect addresses provided by the customer.
Refund Policy
Refund Policy – BILLIONS BIRDS
At BILLIONS BIRDS, customer satisfaction is our top priority. If you are not completely satisfied with your purchase, we’re here to help.
1. Return Eligibility
You may request a return within 14 days of receiving your order. To qualify for a return:
The item must be unused, unworn, and in the same condition as received.
The item must be in its original packaging.
Proof of purchase (order confirmation or receipt) is required.
Certain items may not be eligible for return, including clearance items, gift cards, or personalised/custom products.
2. Non-Refundable Items
The following items are non-refundable:
Final sale or discounted items
Gift cards
Items damaged due to misuse, negligence, or improper care
3. Return Process
To initiate a return, please contact our customer support team with your order number and reason for return. If your return is approved, you will receive instructions for returning the item.
Unless the item is defective or incorrect, customers are responsible for return shipping costs.
4. Refund Processing
Once we receive and inspect your returned item:
We will notify you of the approval or rejection of your refund.
If approved, the refund will be issued to your original payment method within 5–10 business days.
Please note that banks or payment providers may require additional time to process refunds.
5. Damaged or Incorrect Items
If you receive a damaged, defective, or incorrect item, please contact us within 7 days of delivery and provide clear photos of the product and packaging. We will arrange a replacement or full refund at no additional cost.
6. Late or Missing Refunds
If you have not received your refund:
Check your bank account again.
Contact your credit card company or payment provider.
If the issue persists, don't hesitate to contact our support team for assistance.
Recommended Products
Customer reviews
Share your thoughts with other customers
Be the first one to write a review!

Items (0)
