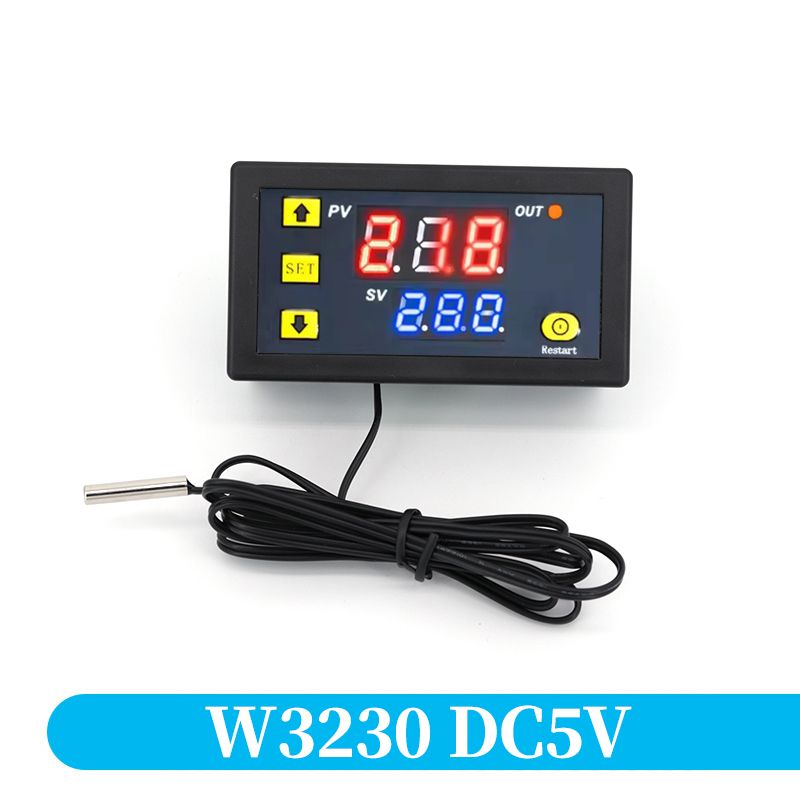
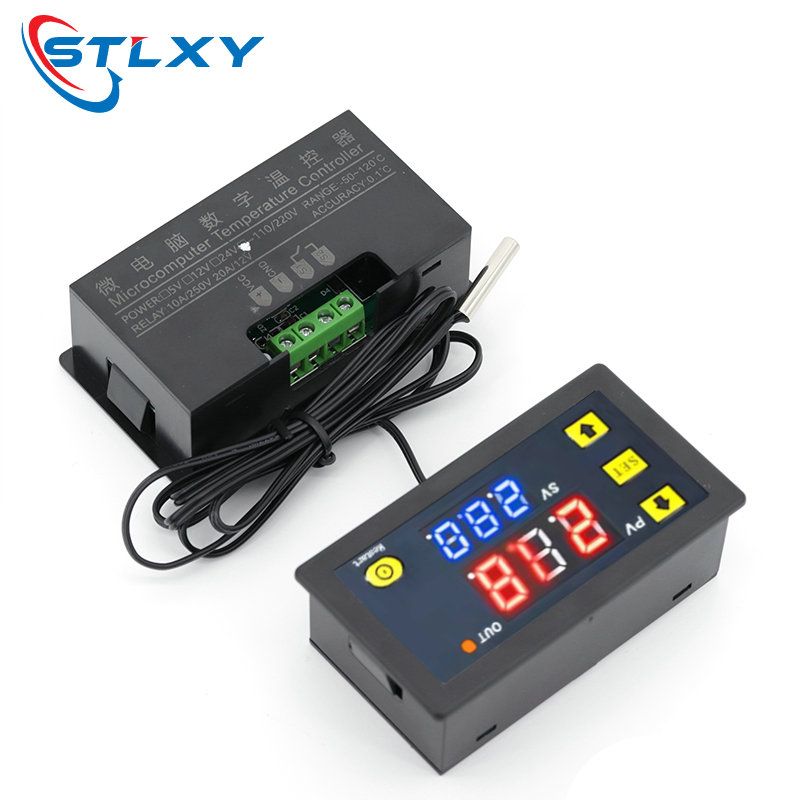
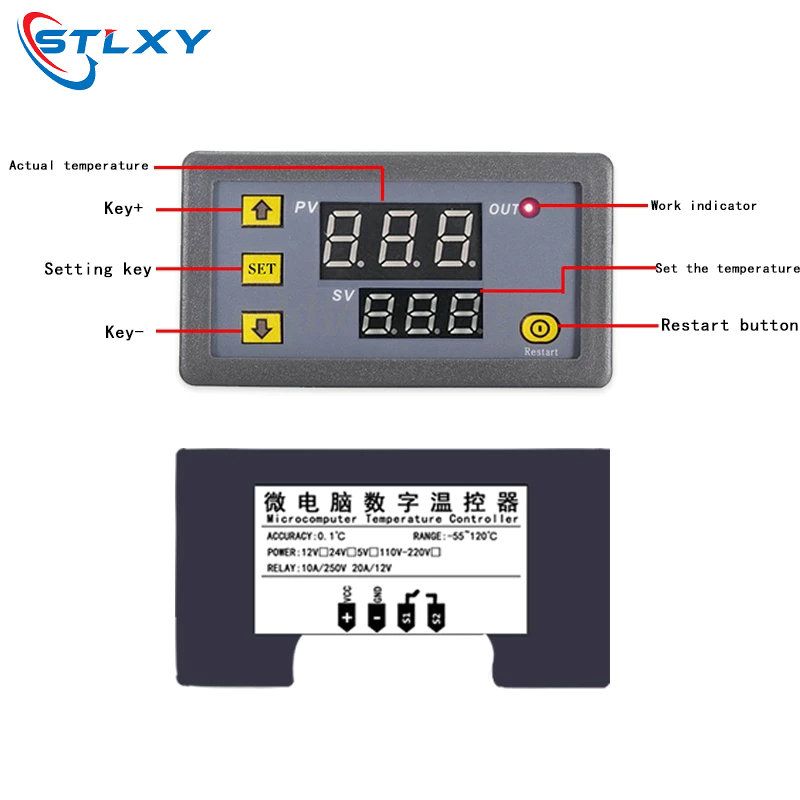

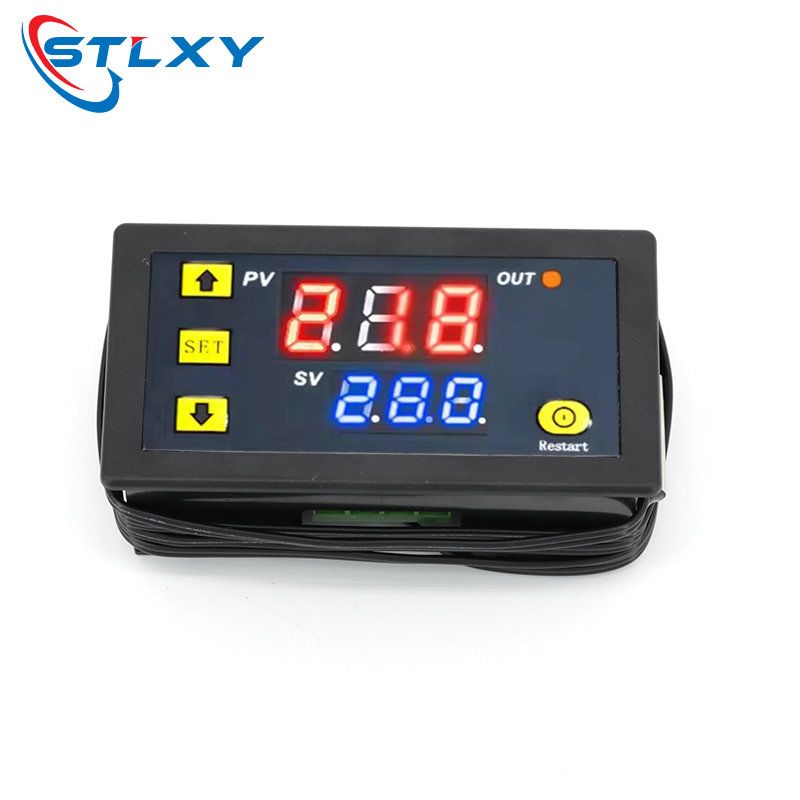
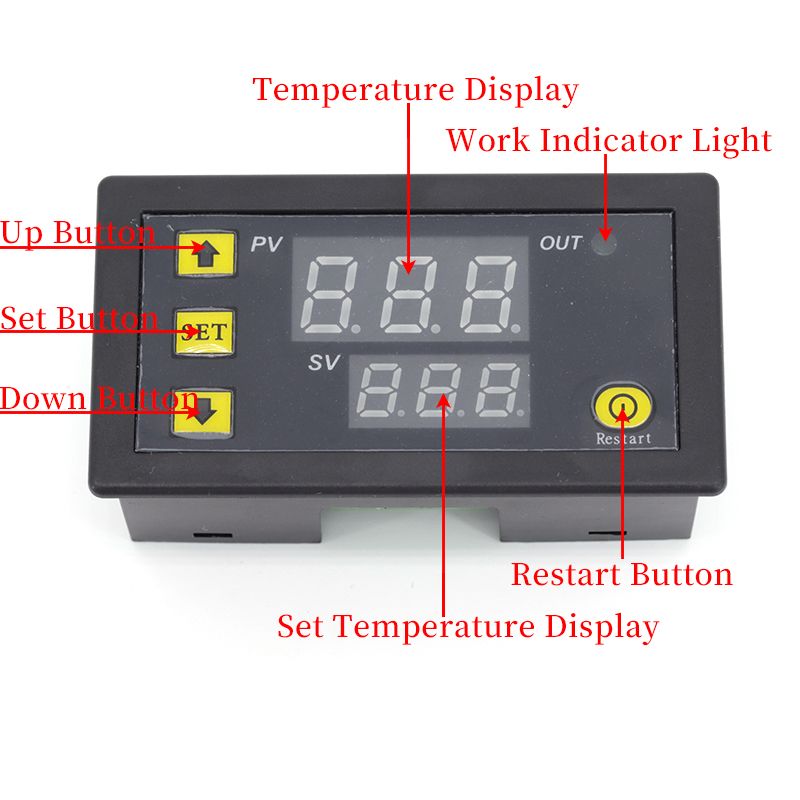
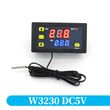


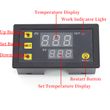
W3230 12V 24V AC110-220V Probe line 20A Digital Temperature Control LED Display Thermostat With Heat/Cooling Control Instrument
Includes all taxes
Meet your Seller
-
$3.47Sold by BILLIONS BIRDS
Description
W3230 DC 12V 24V 110V 220V AC Digital Temperature Controller LED Display Thermostat With Heating Cooling Switch NTC Sensor
Mini temperature controller.
With clear LED display for better readability.
Wide temperature measuring range.
Heating or cooling control.
All parameters setting can be saved after short circuit.
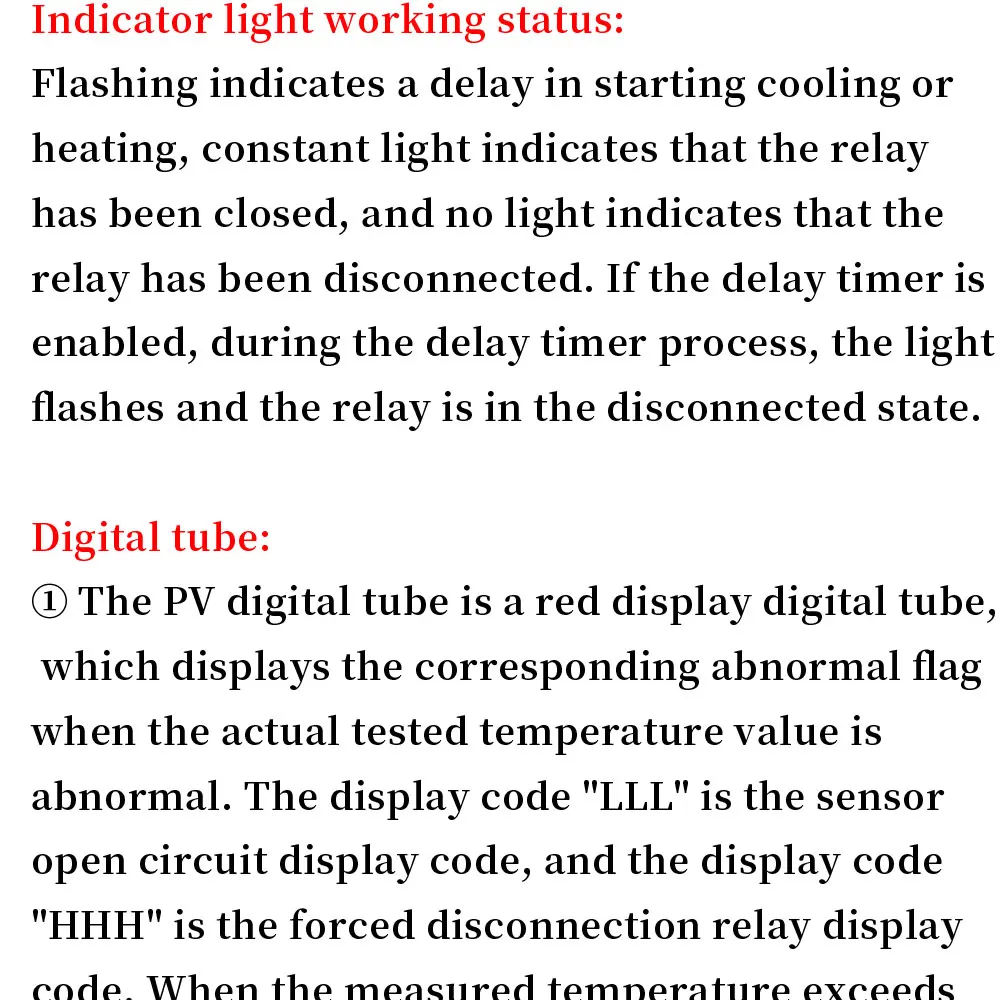
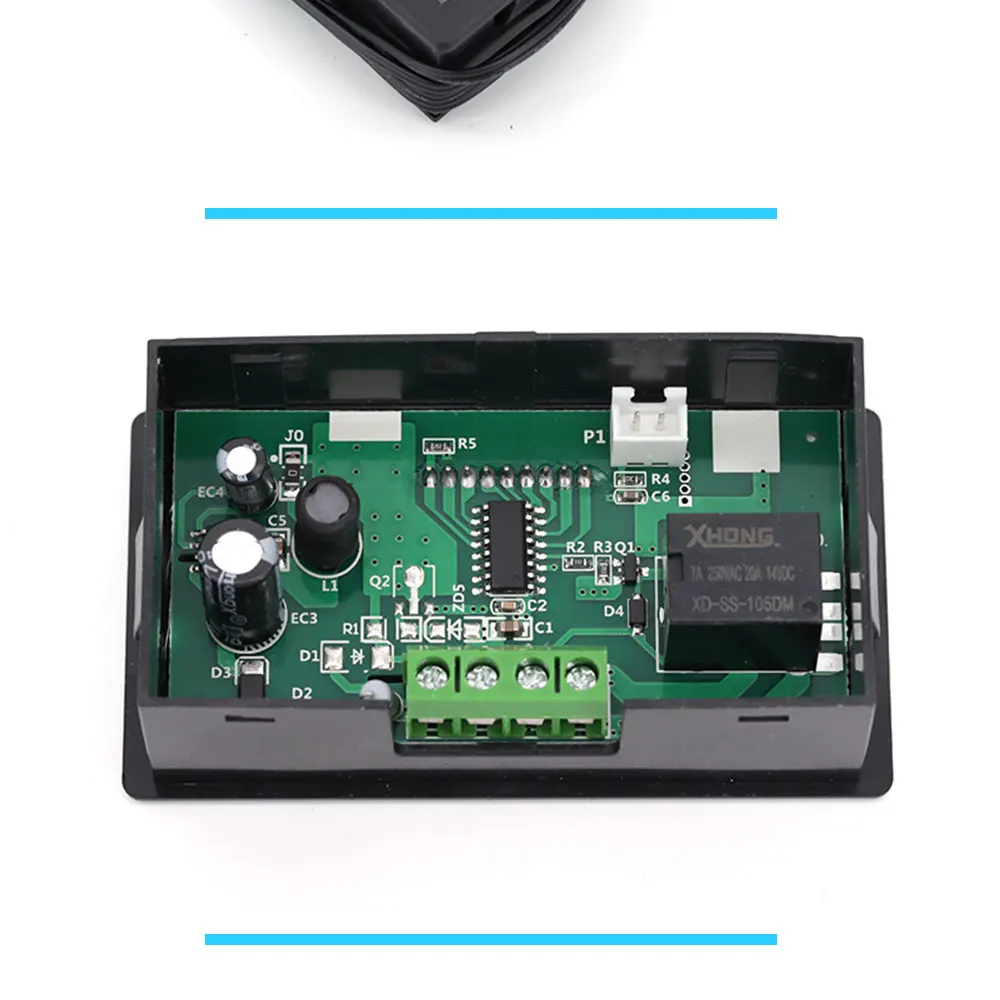
Relay output.
High Control precision 0.1 centigrade
Can be used for domestic freezer,water tanks,refrigerator,industrial chiller,steamer,industrial equipment and other temperature-controlled system.
Power Supply:12V DC/24V DC/110V-220V AC
Temperature Control Range:-55°-120°
Resolution Ratio: 0.1°C(-9.9-99.9); 1°C(other range)
Color of Displaying: red/blue
Measurement accuracy: ±0.1°C
Control accuracy: 0.1°C
Sensor: NTC10K Waterproof sensor
Output: Relay Contact Capacity 10A 220V / 20A 12V / 20A 24V
Environmental requirements: -10-60°C,humidity 20%-85%RH
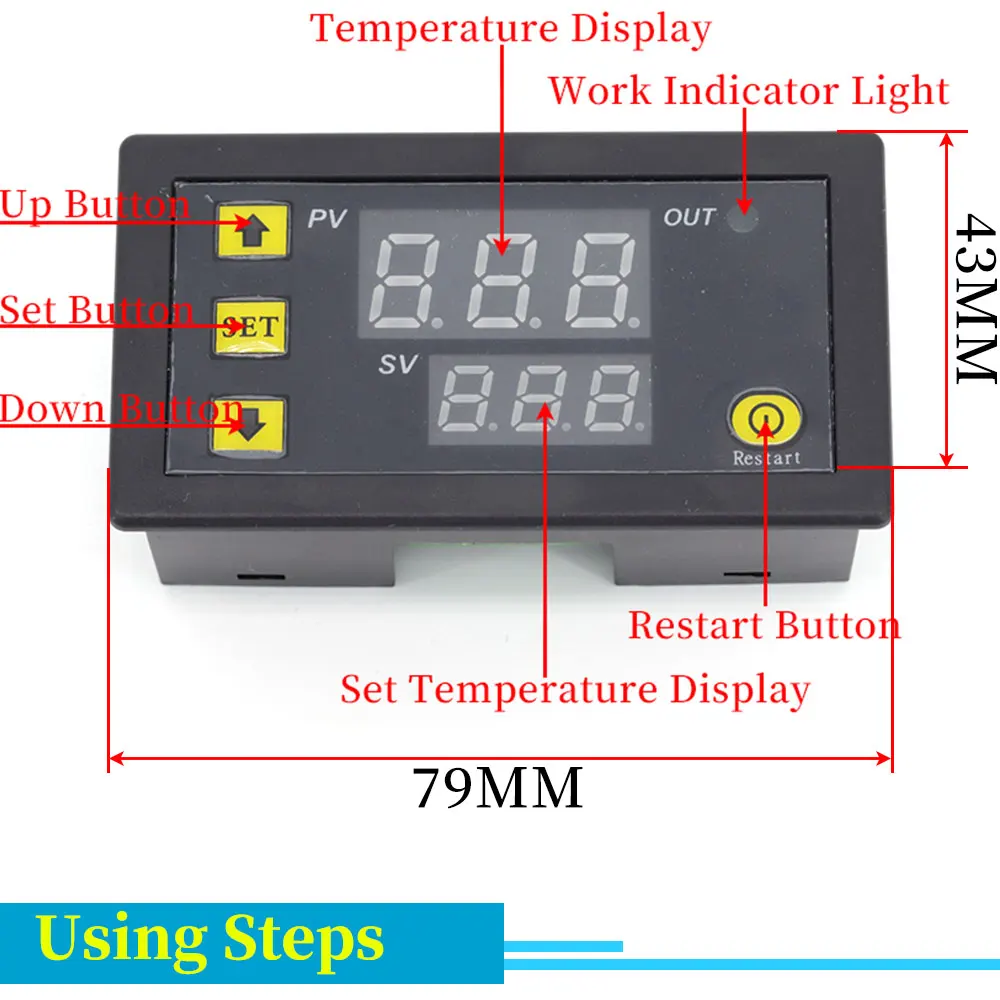
Dimension:79mm *43mm*26mm
Cutting Size:73mm*39mm
Sensor wire: 1 meter
Code table:
Code | Function | Set Range | Default |
P0 | Heating/Cooling | H/C | C |
P1 | Return Difference | 0.1-30 | 2 |
P2 | Setting limits to the manimum | 120 | 120 |
P3 | Setting limits to the minimum | -55 | -55 |
P4 | Temp. Correction | -20 | 0 |
P5 | Delay Start | 0-10min | 0 |
P6 | Alarm Temp | -175 | OFF |
P7 | Data locked | ON/OFF | OFF |
P8 | Restore factory settings | ON/OFF | OFF |
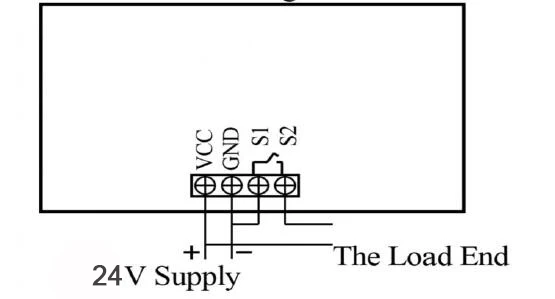
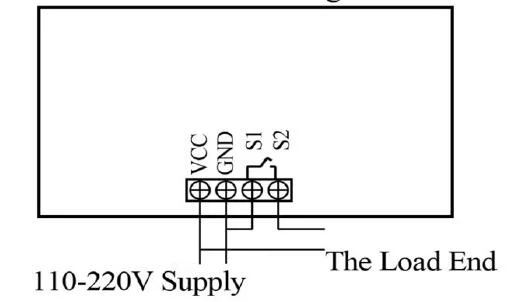
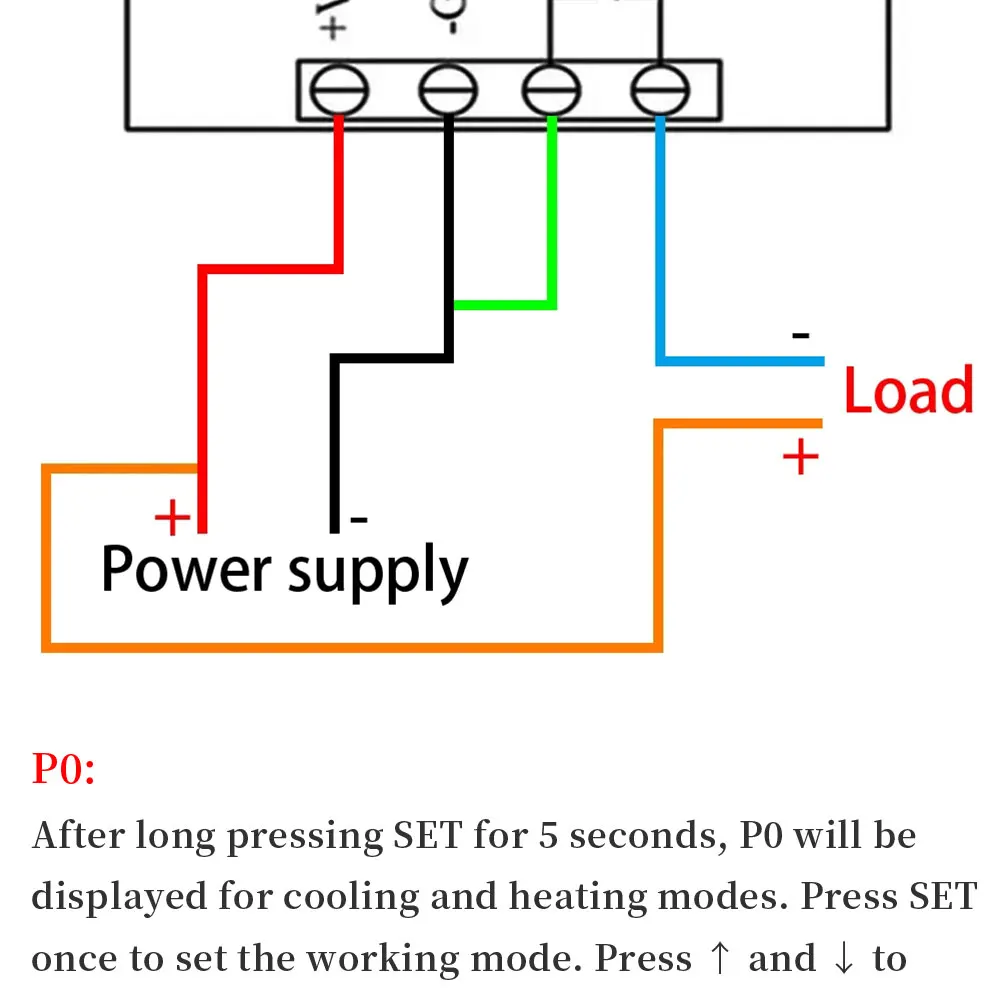
Wiring Diagram:
12V DC:

24V DC:
110V-220V AC:


Shop Policies
Payment Policy
Payment Policy – BILLIONS BIRDS
At BILLIONS BIRDS, we are committed to providing a safe, secure, and seamless payment experience for our customers.
1. Accepted Payment Methods
We accept the following payment options:
Major Credit & Debit Cards (Visa, MasterCard, American Express)
Secure Online Payment Gateways (such as PayPal, Stripe, or other providers available at checkout)
Any additional payment methods displayed during checkout
All payments must be completed in full at the time of purchase.
2. Secure Transactions
All transactions are processed through encrypted and secure payment systems to protect your personal and financial information. We do not store your full payment details on our servers.
3. Currency
Prices are displayed in the currency indicated on the website. If you are purchasing from another country, your bank may apply currency conversion fees.
4. Order Confirmation
Once your payment has been successfully processed, you will receive an order confirmation email containing your purchase details.
5. Failed or Declined Payments
If your payment is declined, please verify your billing information or contact your bank. Orders will only be processed after successful payment confirmation.
6. Fraud Prevention
BILLIONS BIRDS reserves the right to cancel or refuse any order if fraud or unauthorised activity is suspected.
Delivery Policy
Delivery Policy – BILLIONS BIRDS
At BILLIONS BIRDS, we are dedicated to delivering your orders safely and efficiently.
1. Order Processing
All orders are processed within 1–3 business days after payment confirmation. Orders are not processed or shipped on weekends or public holidays.
2. Shipping Times
Estimated delivery times vary depending on your location:
Domestic Shipping: 3–7 business days
International Shipping: 7–15 business days
Please note that delivery times are estimates and may vary due to customs procedures, carrier delays, weather conditions, or other unforeseen circumstances.
3. Shipping Costs
Shipping fees are calculated at checkout based on your location and selected shipping method. Any customs duties, taxes, or import fees are the customer's responsibility.
4. Tracking Information
Once your order has been shipped, you will receive a confirmation email with tracking details (if available) so you can monitor your package.
5. Delivery Issues
If your order is delayed, lost, or arrives damaged, please contact us within 7 days of the expected delivery date. We will work with the shipping carrier to resolve the issue as quickly as possible.
6. Incorrect Shipping Information
Customers are responsible for providing accurate shipping details at checkout. BILLIONS BIRDS is not responsible for orders shipped to incorrect addresses provided by the customer.
Refund Policy
Refund Policy – BILLIONS BIRDS
At BILLIONS BIRDS, customer satisfaction is our top priority. If you are not completely satisfied with your purchase, we’re here to help.
1. Return Eligibility
You may request a return within 14 days of receiving your order. To qualify for a return:
The item must be unused, unworn, and in the same condition as received.
The item must be in its original packaging.
Proof of purchase (order confirmation or receipt) is required.
Certain items may not be eligible for return, including clearance items, gift cards, or personalised/custom products.
2. Non-Refundable Items
The following items are non-refundable:
Final sale or discounted items
Gift cards
Items damaged due to misuse, negligence, or improper care
3. Return Process
To initiate a return, please contact our customer support team with your order number and reason for return. If your return is approved, you will receive instructions for returning the item.
Unless the item is defective or incorrect, customers are responsible for return shipping costs.
4. Refund Processing
Once we receive and inspect your returned item:
We will notify you of the approval or rejection of your refund.
If approved, the refund will be issued to your original payment method within 5–10 business days.
Please note that banks or payment providers may require additional time to process refunds.
5. Damaged or Incorrect Items
If you receive a damaged, defective, or incorrect item, please contact us within 7 days of delivery and provide clear photos of the product and packaging. We will arrange a replacement or full refund at no additional cost.
6. Late or Missing Refunds
If you have not received your refund:
Check your bank account again.
Contact your credit card company or payment provider.
If the issue persists, don't hesitate to contact our support team for assistance.
Recommended Products
Customer reviews
Share your thoughts with other customers
Be the first one to write a review!

Items (0)
